note : Layout selection
The Layout list only appears for cheque forms.
If you have selected an image element, you can also click Browse and insert a different image in the field. For more information about editing elements, see Adding and editing graphic elements.
|
1
|
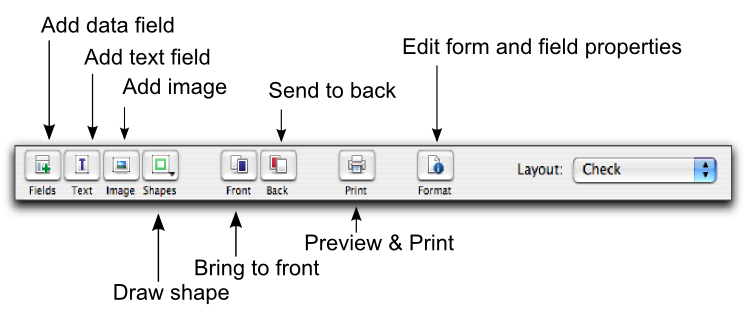
Click the Fields button. The Add Fields window appears. This window lists all the data fields available for the form you’ve selected.
|
|
3
|
Click Add. The selected data fields appear on the form. Their position depends on a number of factors, such as the number of records they can display, previous cursor position and other fields already on the form. You can move a field to a better position.
|
|
4
|
If you want to change the properties of a data field, double-click it. The Field Properties window appears.
|
The Field Properties window has two tabs: the Layout tab where you specify the text, format, background colour, location and size of the field, and the Borders tab where you specify the layout, colour and width of the field’s borders.
|
1
|
Click the add text button (
 ) and then click the form where you want to place the text field. A new text label named Text Field appears. ) and then click the form where you want to place the text field. A new text label named Text Field appears. |
|
2
|
Double-click the new label. The Field Properties window displays the Layout tab where you specify the name, location and size, text format and background colour of the label, and the Borders tab where you specify the layout, colour and width of the label’s borders.
|
|
3
|
|
1
|
Double-click the text label. The Field Properties window appears.
|
|
2
|
|
3
|
Click OK.
|
|
1
|
Double-click the data field or text label to be changed. The Field Properties window appears.
|
|
2
|
|
3
|
|
a
|
|
b
|
|
5
|
Click OK.
|