In your software, the term receiving money specifically refers to recording receipts other than payments relating to invoices. These receipts include capital injections, interest, adjustments, and so on. These can be entered using the Receive Money window or by selecting the Receive Money transaction type in the Bank Register window.
The Receive Money window lets you record more details about the receipt and allocate the receipt to more than one account. This is the procedure covered in this section. If you want to use the Bank Register window—which lets you record a receipt with minimum details—see ‘Entering transactions in the Bank Register window’.
If you want to record a payment for an invoice entered using the Sales command center, use the Receive Payments window or select the Receive Payment transaction type in the Bank Register window. See ‘Receiving payments’ for more information.
You can print and email payment receipts for payments entered in the Receive Money and Bank Register windows. For more information, see ‘Printing and Emailing payment receipts’.
Business Services is a set of subscription services that you can use to process credit card payments from customers, send electronic payments to vendors and deposit paychecks for your employees over the Internet directly from your software. With the Merchant Account Service, you can authorize customer credit card payments online using your software. For more information, see ‘Set up Business Services’.
|
1
|
|
▪
|
Deposit to Account—In the Deposit to Account field, type or select the required bank account.
|
|
▪
|
Group with Undeposited Funds—Choose this option if you want the deposit to be recorded in the undeposited funds account. After you have grouped all the deposit transactions you want, you can make one bank deposit for all the undeposited funds. For more information, see ‘Bank deposits’.
|
|
3
|
In the Payor field, type or select the payor’s name.
|
|
4
|
In the Amount Received field, type the amount received.
|
|
5
|
[Optional] In the Payment Method field, select the payment method.
|
|
6
|
[Optional] If you want to record additional details about the transaction, such as a check number, click Details and record the details in the Applied Payment Details window that appears.
|
|
7
|
|
9
|
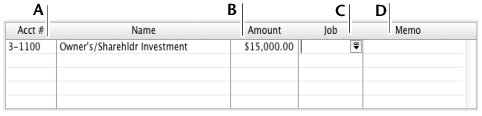
[Optional] Type a detailed comment in the Memo field to help you identify the transaction later.
|
 |
|
|
Type the amount you want to assign to each account. The total amount in this column must equal the amount in the Amount Received field before you can record the transaction.
|
|
|
11
|
If the payment covers more than one account, repeat step 10 on a new transaction line.
|
|
12
|
If you want to assign the transaction to a particular category, select a category from the Category list. For more information about categories, see ‘Tracking financial information’.
|
To store the transaction as a recurring transaction so that you can use it again, click Save as Recurring. In the Edit Recurring Schedule window, enter the necessary information and click Save.
|
13
|
Click Record.
|
