|
1
|
|
2
|
|
3
|
|
5
|
Type the name of the vendor and press Tab. Additional fields appear.
|
|
6
|
Enter a code to identify this vendor in the Card ID field. For more information, see ‘Card identification codes’.
|
If you want to enter more contact information, select Address 2 from the Locations list and enter the additional details. You can enter contact details for five locations.
|
8
|
Click the Card Details tab. You can enter notes about the vendor, insert a picture, and assign attributes to group and sort the card. You can also assign a commission rate to the card.
|
|
9
|
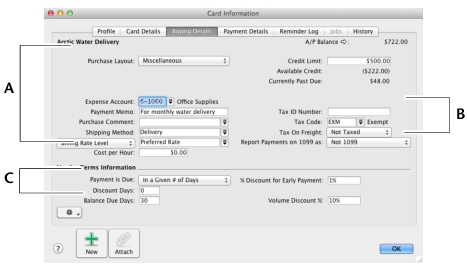
Click the Buying Details tab and enter your buying details.
|
 |
||
|
10
|
If you pay this vendor using Vendor Payments, click Payment Details and enter the vendor’s banking details. For more information, see ‘Set up Business Services’.
|
|
11
|
[Optional] Click the History tab and type the dollar value of the purchases made prior to your conversion month. You can also type or select the date that the contact became a vendor.
|
|
12
|
