Adding and editing data and label elements
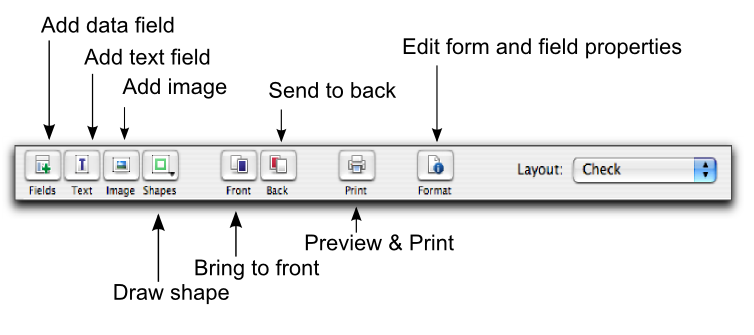
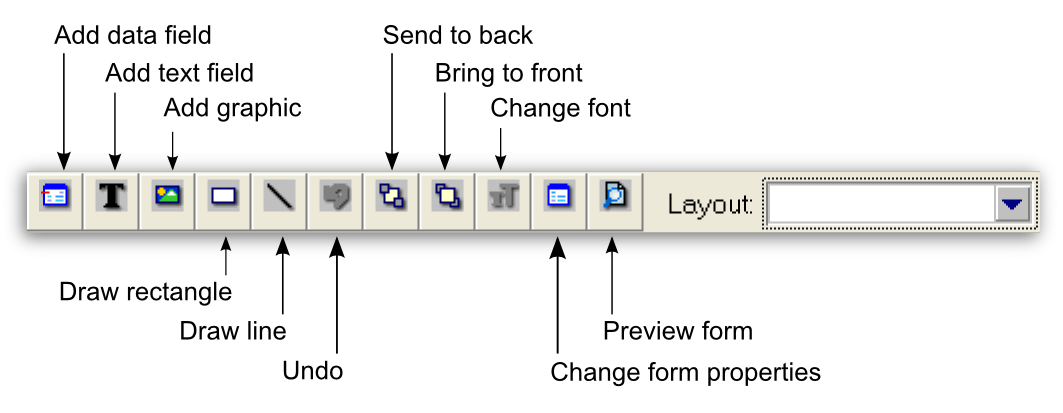
You can add elements to, and change elements on, a form using the tool palette shown below:
note : Layout selection
The Layout list only appears for check forms.
The Format window enables you to change the format of any element on your form. The changes you make are shown on the form immediately. You can leave the Format window open while you work on the form.
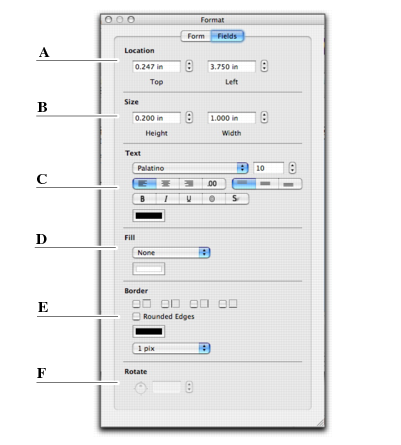
The fields available in the Format window change, depending upon which type of field you have selected. The following fields are available when editing text elements.
 |
|
|
Change the size of the element. Note that images may stretch if you resize them this way.
|
|
If you have selected an image element, you can also click Browse and insert a different image in the field.
For more information about editing elements, see the relevant procedure below.
|
1
|
Click the Fieldsadd data
|
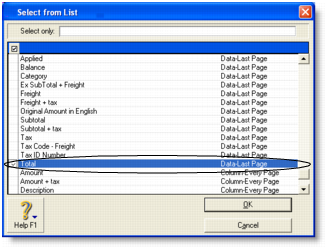

The column on the right indicates the field type (Data, Column) and where it appears on a form. For example, the Total field only appears on the last page (as shown).
For more information about the data fields that are available in each form type, see Form fields.
|
2
|
|
3
|
If you want to display the data field title at the top of a column or next to a data field, select header and display options in the bottom of the window.
|
|
4
|
Note that the Add Fields window can be left open on your desktop while you are working on the form.
|
1
|
If you want to change the properties of a data field, double-click it. The Field Properties window appears.
|
The Field Properties window has two tabs: the Layout tab where you specify the text, format, background color, location, and size of the field, and the Borders tab where you specify the layout, color, and width of the field’s borders.
|
2
|
|
3
|
Make your changes in the Format window. The appearance of the data field will be updated as you make selections.
|
|
1
|
Click the Text buttonadd text button(
|
|
2
|
Move the field to where you want by dragging and dropping or using your keyboard arrows.
|
|
3
|
|
5
|
If you want to change the properties of the text field, click Format button. The Format window appears.
|
|
6
|
In the Fields tab, set the properties of the field, including text appearance, format, background color, borders, location, and size of the field, etc.
|
|
7
|
Double-click the field. The Field Properties window displays the Layout tab where you specify the text content, location and size, text format, and background color of the field, and the Borders tab where you specify the layout, color, and width of the field’s borders.
|
|
8
|
If the text is longer than the size of the field, you may need to resize it—see ‘Editing all elements with common commands’.
|
1
|
|
2
|
|
3
|
Click OK.
|
|
2
|
|
3
|
In the Fields tab, make the required changes.
|
|
4
|
|
5
|
Double-click the data field or text label to be changed. The Field Properties window appears.
|
|
6
|
|
7
|
|
a
|
|
b
|
|
9
|
Click OK.
|