An example of a custom list is Color, in which you create list entries of ‘yellow,’ ‘red,’ ‘green’, and ‘blue.’ When you create or edit your items, you can assign them one of these colors. When you run an inventory report, such as the Analyze Inventory Summary report, you can choose to include only ‘red’ items in the report.
|
1
|
Go to the Lists menu, choose Custom Lists & Field Names, and then click Items. The Custom List and Field Names window appears.
|
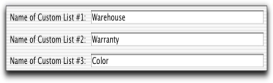
These custom list names will now appear on the Item Information window.
|
1
|
|
2
|
Select the custom list for which you want to make entries in the Custom List field.
|
|
3
|
Click New and type the name of the list entry. For example, if you have a color list, you would type a color, such as Yellow.
|
|
4
|
Click OK.
|
|
6
|
|
1
|
|
2
|
Click the zoom arrow (
 ) to the left of the item. The Item Information window appears. ) to the left of the item. The Item Information window appears. |
|
3
|
Click the Item Details tab.
|
|
5
|
Click OK.
|
