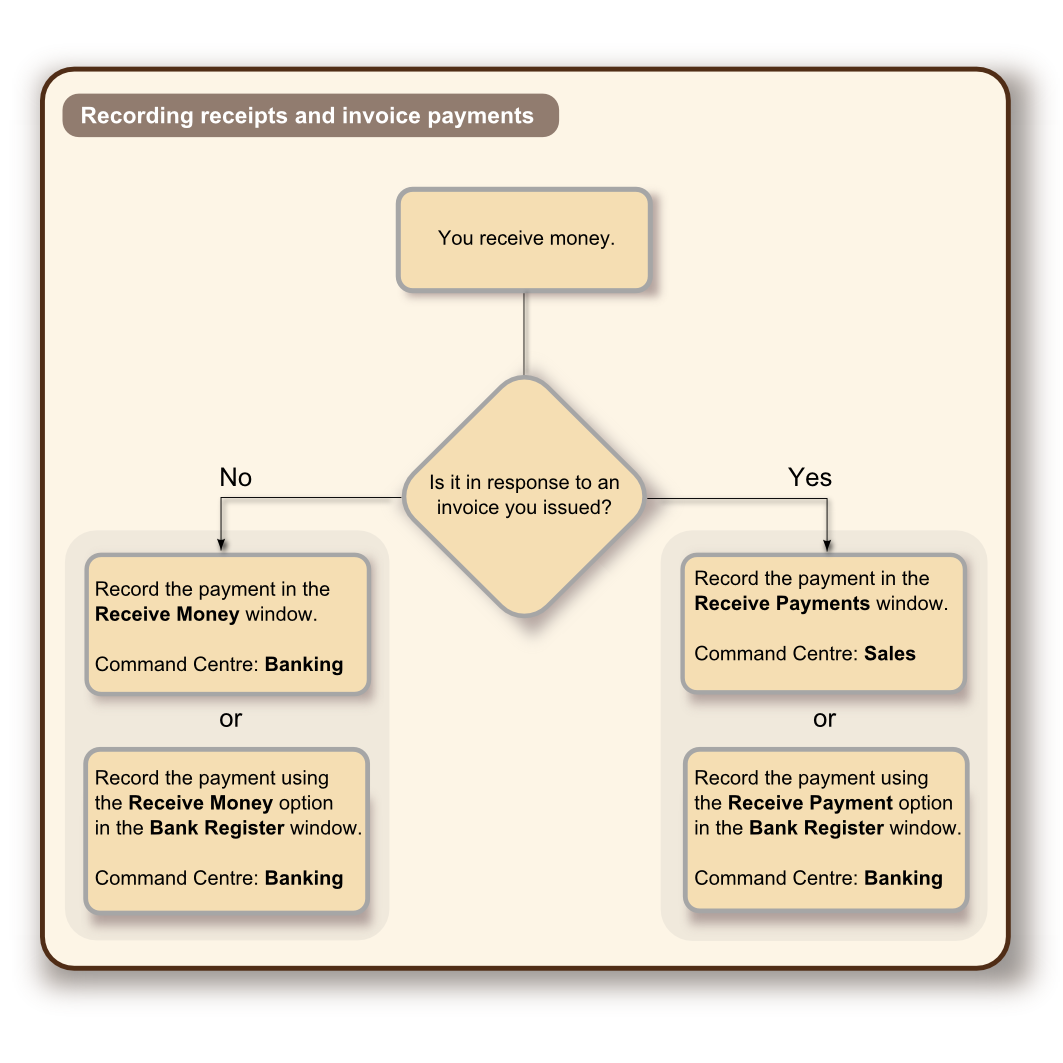
In AccountEdge software, the term receiving money specifically refers to recording receipts other than payments relating to invoices. These receipts include capital injections, interest, adjustments and so on. These can be entered using the Receive Money window or by selecting the Receive Money transaction type in the Bank Register window.
The Receive Money window lets you record more details about the receipt and allocate it to more than one account. This is the procedure covered in this section. If you want to use the Bank Register window—which lets you record a receipt with minimum details—see To enter a transaction in the Bank Register window.
If you want to enter a payment received from a supplier for a sale, you will need to enter it using the Receive Payments window or by selecting the Pay Purchase transaction type in the Bank Register window. For more information, see Receiving payments.

You can print payment receipts for payments entered in the Receive Money and Bank Register windows. For more information about printing payment receipts, see Printing payment receipts.

 ).
).